Create your first engagement
An engagement is the container for a defined piece of work for one client. Before creating an engagement, make sure you have already added the client to Kuberan AI.
Before you begin
- The client must already exist in Clients
- If you plan to assign a playbook, build it first or confirm the playbook you want is in the library — see Using playbooks
- If you plan to assign a team member, they must already be invited to the workspace
Creating an engagement
Navigate to Practice > Engagements
In the left sidebar, click Practice, then click Engagements. You see the engagements list — or, if you prefer a visual overview, click Board to switch to the kanban view grouped by status.
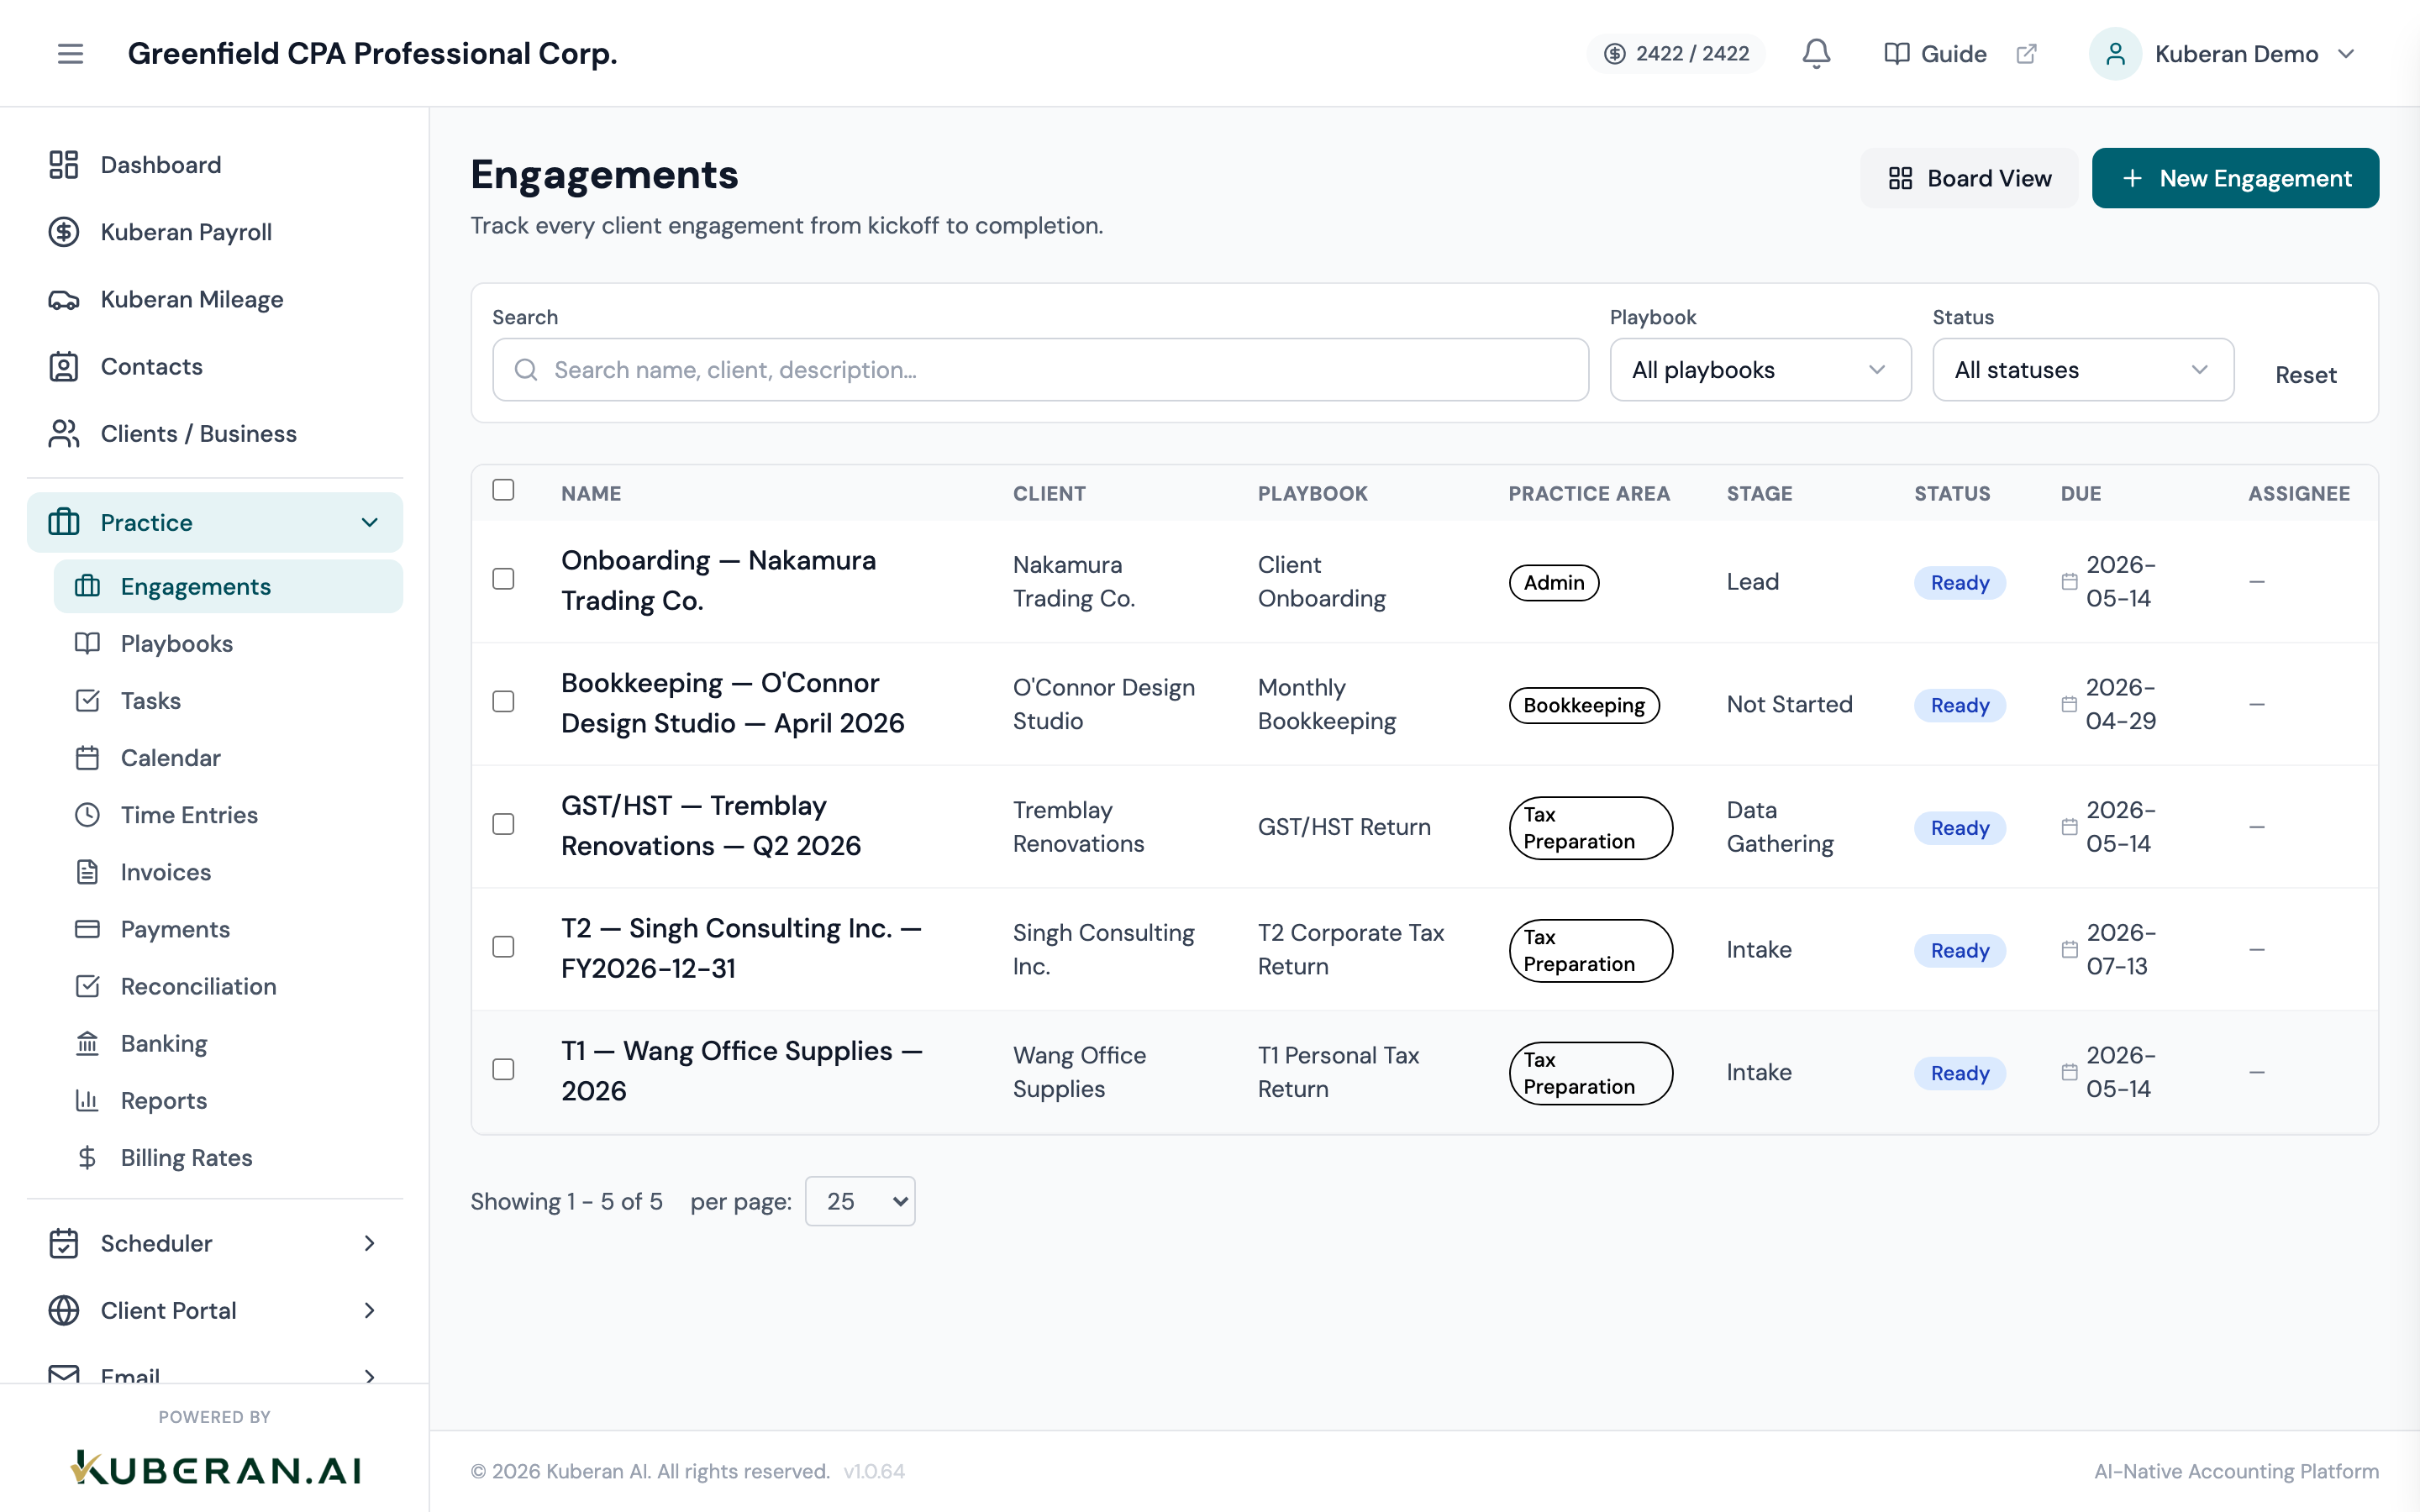
The Engagements screen. Use the list view for detailed information or the board view for a visual workflow overview. Click Add Engagement
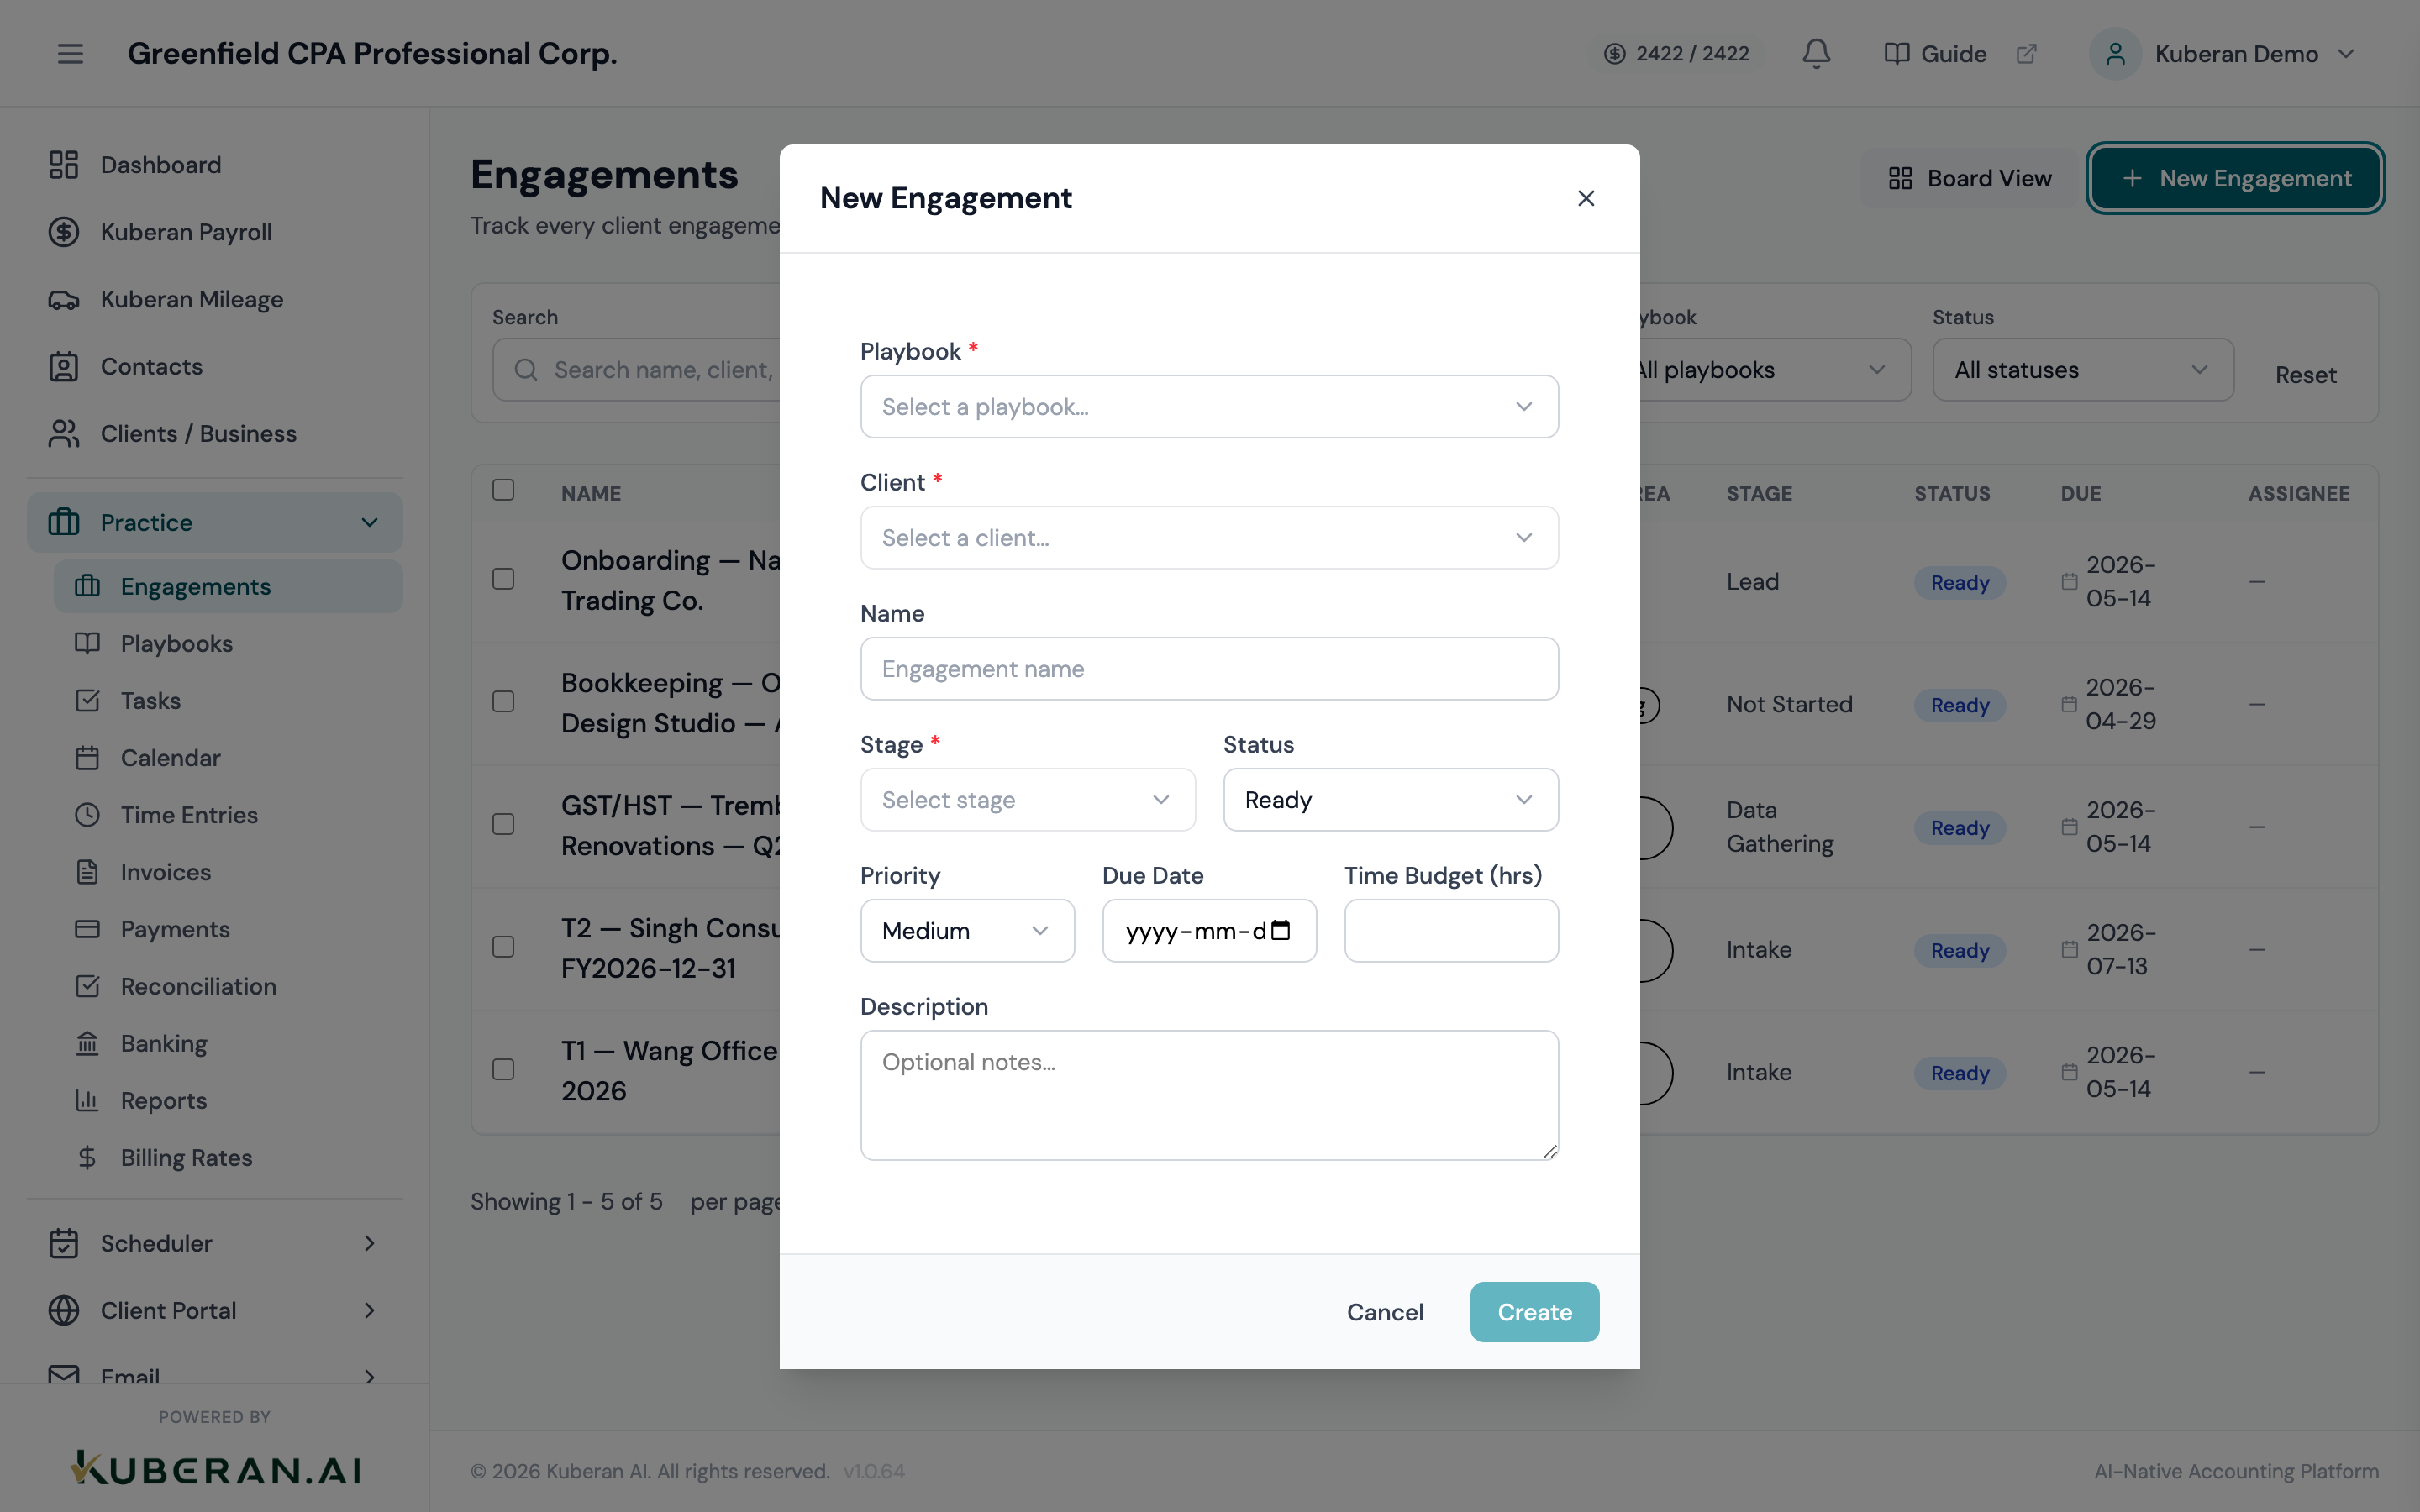
Click the Add Engagement button in the top-right corner. A creation panel opens on the right side of the screen.
Select the client
Start typing the client’s name in the Client field and select them from the dropdown. The client must already exist in the system.
If you are creating many engagements at once (for example, setting up a full client roster at month-start), you can open the Add Engagement panel for each client without closing the list view.
Choose the engagement type
Select the type of work from the Engagement Type dropdown. Common types include:
- Monthly Bookkeeping
- Quarterly Bookkeeping
- Corporate Tax Return
- Personal Tax Return
- GST/HST Filing
- Payroll Processing
- Year-End Review
- Financial Statement Preparation
- Advisory / Consulting
The engagement type is primarily a label that helps you filter and report on your workload. It also determines which playbooks appear as options in the next step.
Assign a playbook (optional but recommended)
If you have a playbook that matches this engagement type, select it from the Playbook dropdown. When you save the engagement, Kuberan AI automatically creates all the tasks from that playbook as the engagement’s checklist.
If you do not assign a playbook, the engagement starts with an empty task list and you can add tasks manually.
See Using playbooks for how to build and manage playbooks.
Set the due date
Enter the date by which this engagement must be completed. Kuberan AI uses this date to:
- Show the engagement in upcoming-deadline views on the dashboard
- Trigger due-date notifications if you have them enabled
- Sort engagements in the default list view
For tax deadline-driven work, use the actual CRA filing deadline rather than an internal target date — this keeps your overdue report accurate.
Assign a team member
Select the team member responsible for this engagement from the Assigned To dropdown. This can be changed later if the work is reassigned.
The assigned team member sees this engagement in their personal task view and receives due-date reminder notifications.
Set the initial status
Choose the starting status for the engagement:
- Not Started — work has not begun; the engagement is queued
- In Progress — work is actively underway
- Waiting on Client — you are waiting for documents or information from the client
- In Review — the work is complete and awaiting partner or manager review
- Completed — the engagement is finished and invoiced
For most new engagements, start with Not Started unless you are creating the record retroactively for work already underway.
Add a description (optional)
The description field is a good place to note scope, special instructions, or context that does not fit the standard fields. For example: “Client using QuickBooks Online — export CSV for import” or “Partner review required before sending draft financials.”
Click Save
Click Save engagement. The engagement is created and you are taken to the engagement detail page.
What happens after you save
When the engagement is created with a playbook, you will see all the playbook’s tasks listed in the Tasks tab of the engagement. Each task shows:
- The task name
- An empty checkbox (or completion status)
- An optional assignee (inherited from the playbook, or unassigned if the playbook does not specify)
- An optional due date (calculated from the engagement due date if the playbook specifies offsets)
Team members assigned to tasks will see them appear in their personal task list at Practice > Tasks.
Updating the engagement status
As work progresses, update the status by clicking the status badge at the top of the engagement detail page and selecting the new status. You can also drag the engagement between columns on the Board view.
Many firms use a simple status progression:
- Not Started — waiting for client documents
- In Progress — actively working
- Waiting on Client — sent a document request, awaiting response
- In Review — draft ready, partner reviewing
- Completed — work done, invoice sent
Common questions
Can I create multiple engagements for the same client? Yes — and you often will. A client might have simultaneous engagements for monthly bookkeeping, HST filing, and payroll processing. Each is tracked separately.
Can I copy an engagement from last period? Yes. Open an existing completed engagement, click ···, and select Duplicate. This creates a new engagement with the same client, type, playbook, and assignee, but with a blank task completion state and no time entries.
Can I bulk-create engagements for multiple clients? From the Engagements screen, click Bulk Create. Select multiple clients, choose an engagement type and playbook, and Kuberan AI creates one engagement per client. This is useful at the start of each month when you are opening a new period of bookkeeping engagements across your entire client roster.