Time Entries
Overview
The Time Entries screen is where your firm’s billable and non-billable hours are captured, reviewed, and prepared for invoicing. Each entry records who did the work, which engagement it belongs to, how long it took, and at what billing rate. A live timer widget allows team members to track time in real time without interrupting their workflow. Approved entries flow directly to the invoice creation workflow, closing the loop between time worked and revenue billed.
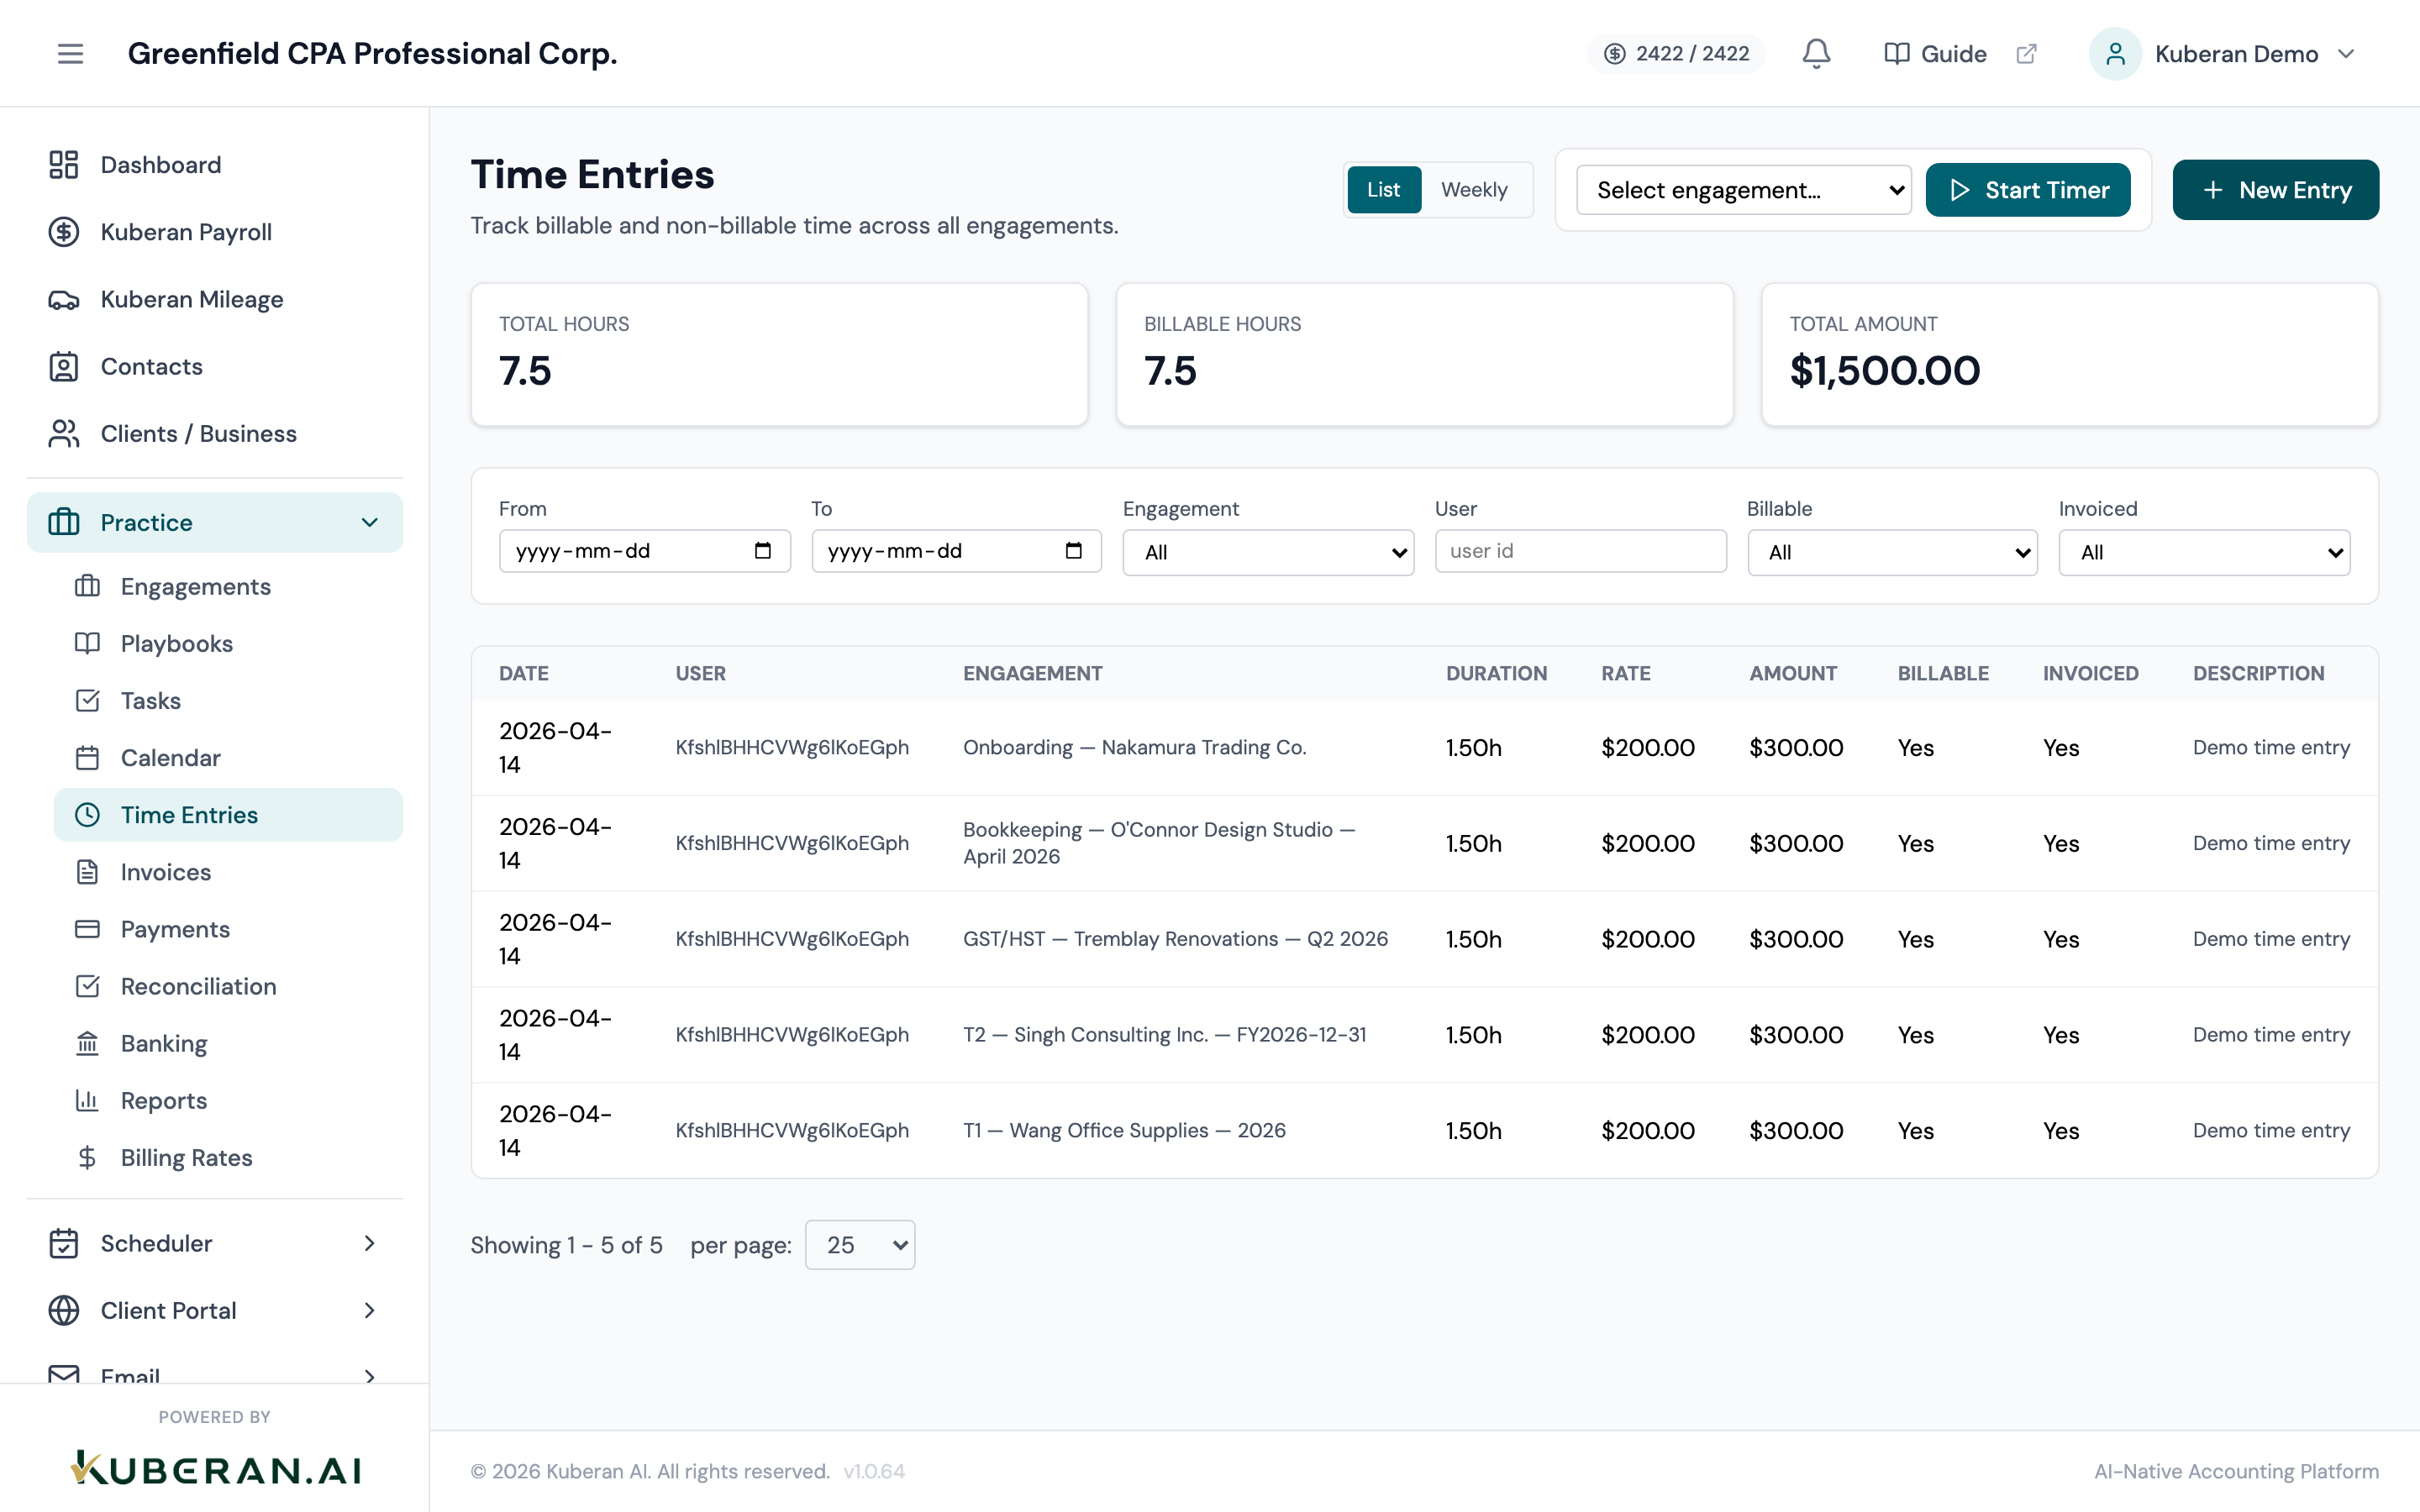
- (1) Live Timer widget — running timer with engagement selector and start/stop controls
- (2) Add Entry button — opens the manual time entry form
- (3) Filter bar — filter by date range, engagement, team member, billing status, and approval status
- (4) Billable toggle — amber indicator on non-billable entries; teal on billable
- (5) Approval badge — Draft, Approved, or Billed status per entry
Screen Layout
Timer bar (top): A persistent widget showing the current timer state. Displays the engagement being timed, elapsed time in HH:MM:SS format, and Start/Stop controls. If no timer is running, this area shows a prompt to start one.
Toolbar (below timer bar): Search field, date range picker (defaults to current week), Engagement filter, Team Member filter, Billable/Non-billable toggle filter, Approval Status filter, and the Add Entry button.
Time entries table: Rows sorted by date descending. Columns: Date, Team Member, Engagement, Task, Description, Duration, Billing Rate, Amount, Billable, Approval Status, Actions.
Summary bar (below table): Shows total hours, total billable hours, and total billable amount for the filtered view.
UI Elements
Timer Widget
Dropdown to select which engagement the running timer is being logged against. Can be changed while the timer is running.
Optional short description entered before or after the timer runs. Pre-fills the Description field of the resulting time entry.
Begins the live timer. The elapsed counter starts from 00:00:00 and updates every second. Only one timer can run at a time per user session.
Stops the running timer and opens a pre-filled time entry form with the elapsed duration, engagement, and description. You can edit any field before saving.
Toolbar
Filters entries to those dated within the selected range. Quick presets: Today, This Week, This Month, Last Month, Custom.
Multi-select dropdown to show entries from one or more engagements.
Filter by team member. Managers can view the full team; regular members see their own entries by default.
Three-state toggle: All, Billable only, Non-billable only.
Filter by entry status: All, Draft, Approved, Billed.
Opens the New Time Entry drawer for manual entry without using the live timer.
Table Columns
The date the work was performed. Sortable.
The team member who logged the entry. Sortable.
Link to the related engagement. Sortable.
Optional link to a specific task within the engagement. Blank if the time was logged at the engagement level.
Free-text description of the work performed.
Time spent formatted as H:MM (e.g., “1:30” for 90 minutes). Sortable.
The rate applied to this entry (e.g., “Senior — $175/hr”). Shown as ”—” for non-billable entries.
Calculated as Duration × Billing Rate. Shown as ”—” for non-billable entries.
Teal “Billable” pill or amber “Non-billable” pill. Click to toggle billable status on Draft entries.
Draft (grey) · Approved (green) · Billed (blue). Entries must be Approved before they can be added to an invoice. Billed entries are locked from editing.
Options depend on entry status: Edit (Draft only), Approve, Mark as Billed, Duplicate, Delete (Draft only).
Actions
Create a Time Entry Manually
- Click Add Entry in the toolbar. The New Time Entry drawer opens.
- Select the Date the work was performed.
- Select the Engagement from the dropdown. Start typing to search.
- Optionally link the entry to a specific Task within the engagement.
- Enter a Description of the work (e.g., “Reconciled bank accounts for March”).
- Enter the Duration in hours and minutes using the HH:MM field.
- Select a Billing Rate from the dropdown. All active rates from your Billing Rates configuration are listed.
- Toggle Billable off if this time should not be charged to the client.
- Click Save Entry. The entry appears in the list with Draft status.
Start and Stop the Live Timer
- In the timer bar at the top of the screen, select the Engagement from the dropdown.
- Optionally type a short Description of what you are about to work on.
- Click ▶ Start Timer. The counter begins from 00:00:00.
- Work on the task. The timer persists across page navigation within Kuberan AI.
- When finished, click ■ Stop Timer. A pre-filled time entry form appears with the exact elapsed duration.
- Review the fields (engagement, task, description, billing rate, billable toggle) and adjust as needed.
- Click Save Entry to commit the logged time.
Edit a Time Entry
- Locate the entry in the list. Only entries with Draft status are editable.
- Click ⋯ → Edit on the row, or click the row to open the detail drawer.
- Modify any fields as needed.
- Click Save. Changes are reflected immediately.
Approve Time Entries
Approving entries marks them as reviewed and ready to invoice. Only users with Manager or Owner roles can approve entries.
- Select one or more Draft entries by clicking their row checkboxes.
- Click Approve in the bulk-action bar, or click ⋯ → Approve on a single row.
- The status badge changes to Approved (green). Approved entries are locked from further edits by team members.
Bill Entries to an Invoice
- Filter the list to show Approved entries for the engagement you want to invoice.
- Select all entries you wish to include on the invoice using the checkboxes.
- Click Create Invoice in the bulk-action bar.
- The New Invoice drawer opens pre-populated with the selected entries as line items.
- Review the invoice, adjust if needed, and click Save Invoice. The time entries’ status changes to Billed and they can no longer be edited.
Export Time Entries
- Apply filters to the list to define the data set you want to export.
- Click Export (download icon) in the toolbar.
- Choose CSV or PDF format.
- The file downloads immediately. The CSV includes all visible columns; the PDF is formatted as a time report suitable for client review.
Delete a Time Entry
- Only Draft entries can be deleted. Approved and Billed entries must be unapproved or voided from the invoice first.
- Click ⋯ → Delete on the Draft entry row.
- Confirm the deletion in the dialogue. The entry is permanently removed.
Related
- Billing Rates — Configure the hourly rates available when logging time entries
- Invoices — Create invoices from approved time entries
- Engagements List — View time entries in the context of a specific engagement
- Reports — Time summary and billing summary reports across your firm