Bank Transactions
Overview
The Bank Transactions screen is where imported bank and credit card transactions are reviewed and posted to the general ledger. Every transaction imported from Plaid, or uploaded via CSV/OFX/QBO, lands here first with an Uncategorised status. You assign each transaction to an account in the chart of accounts (categorising it), which creates the corresponding double-entry journal entry. Bank rules can automate this process for recurring payees. Transactions can also be split across multiple accounts, excluded from the ledger, or grouped for bulk actions.
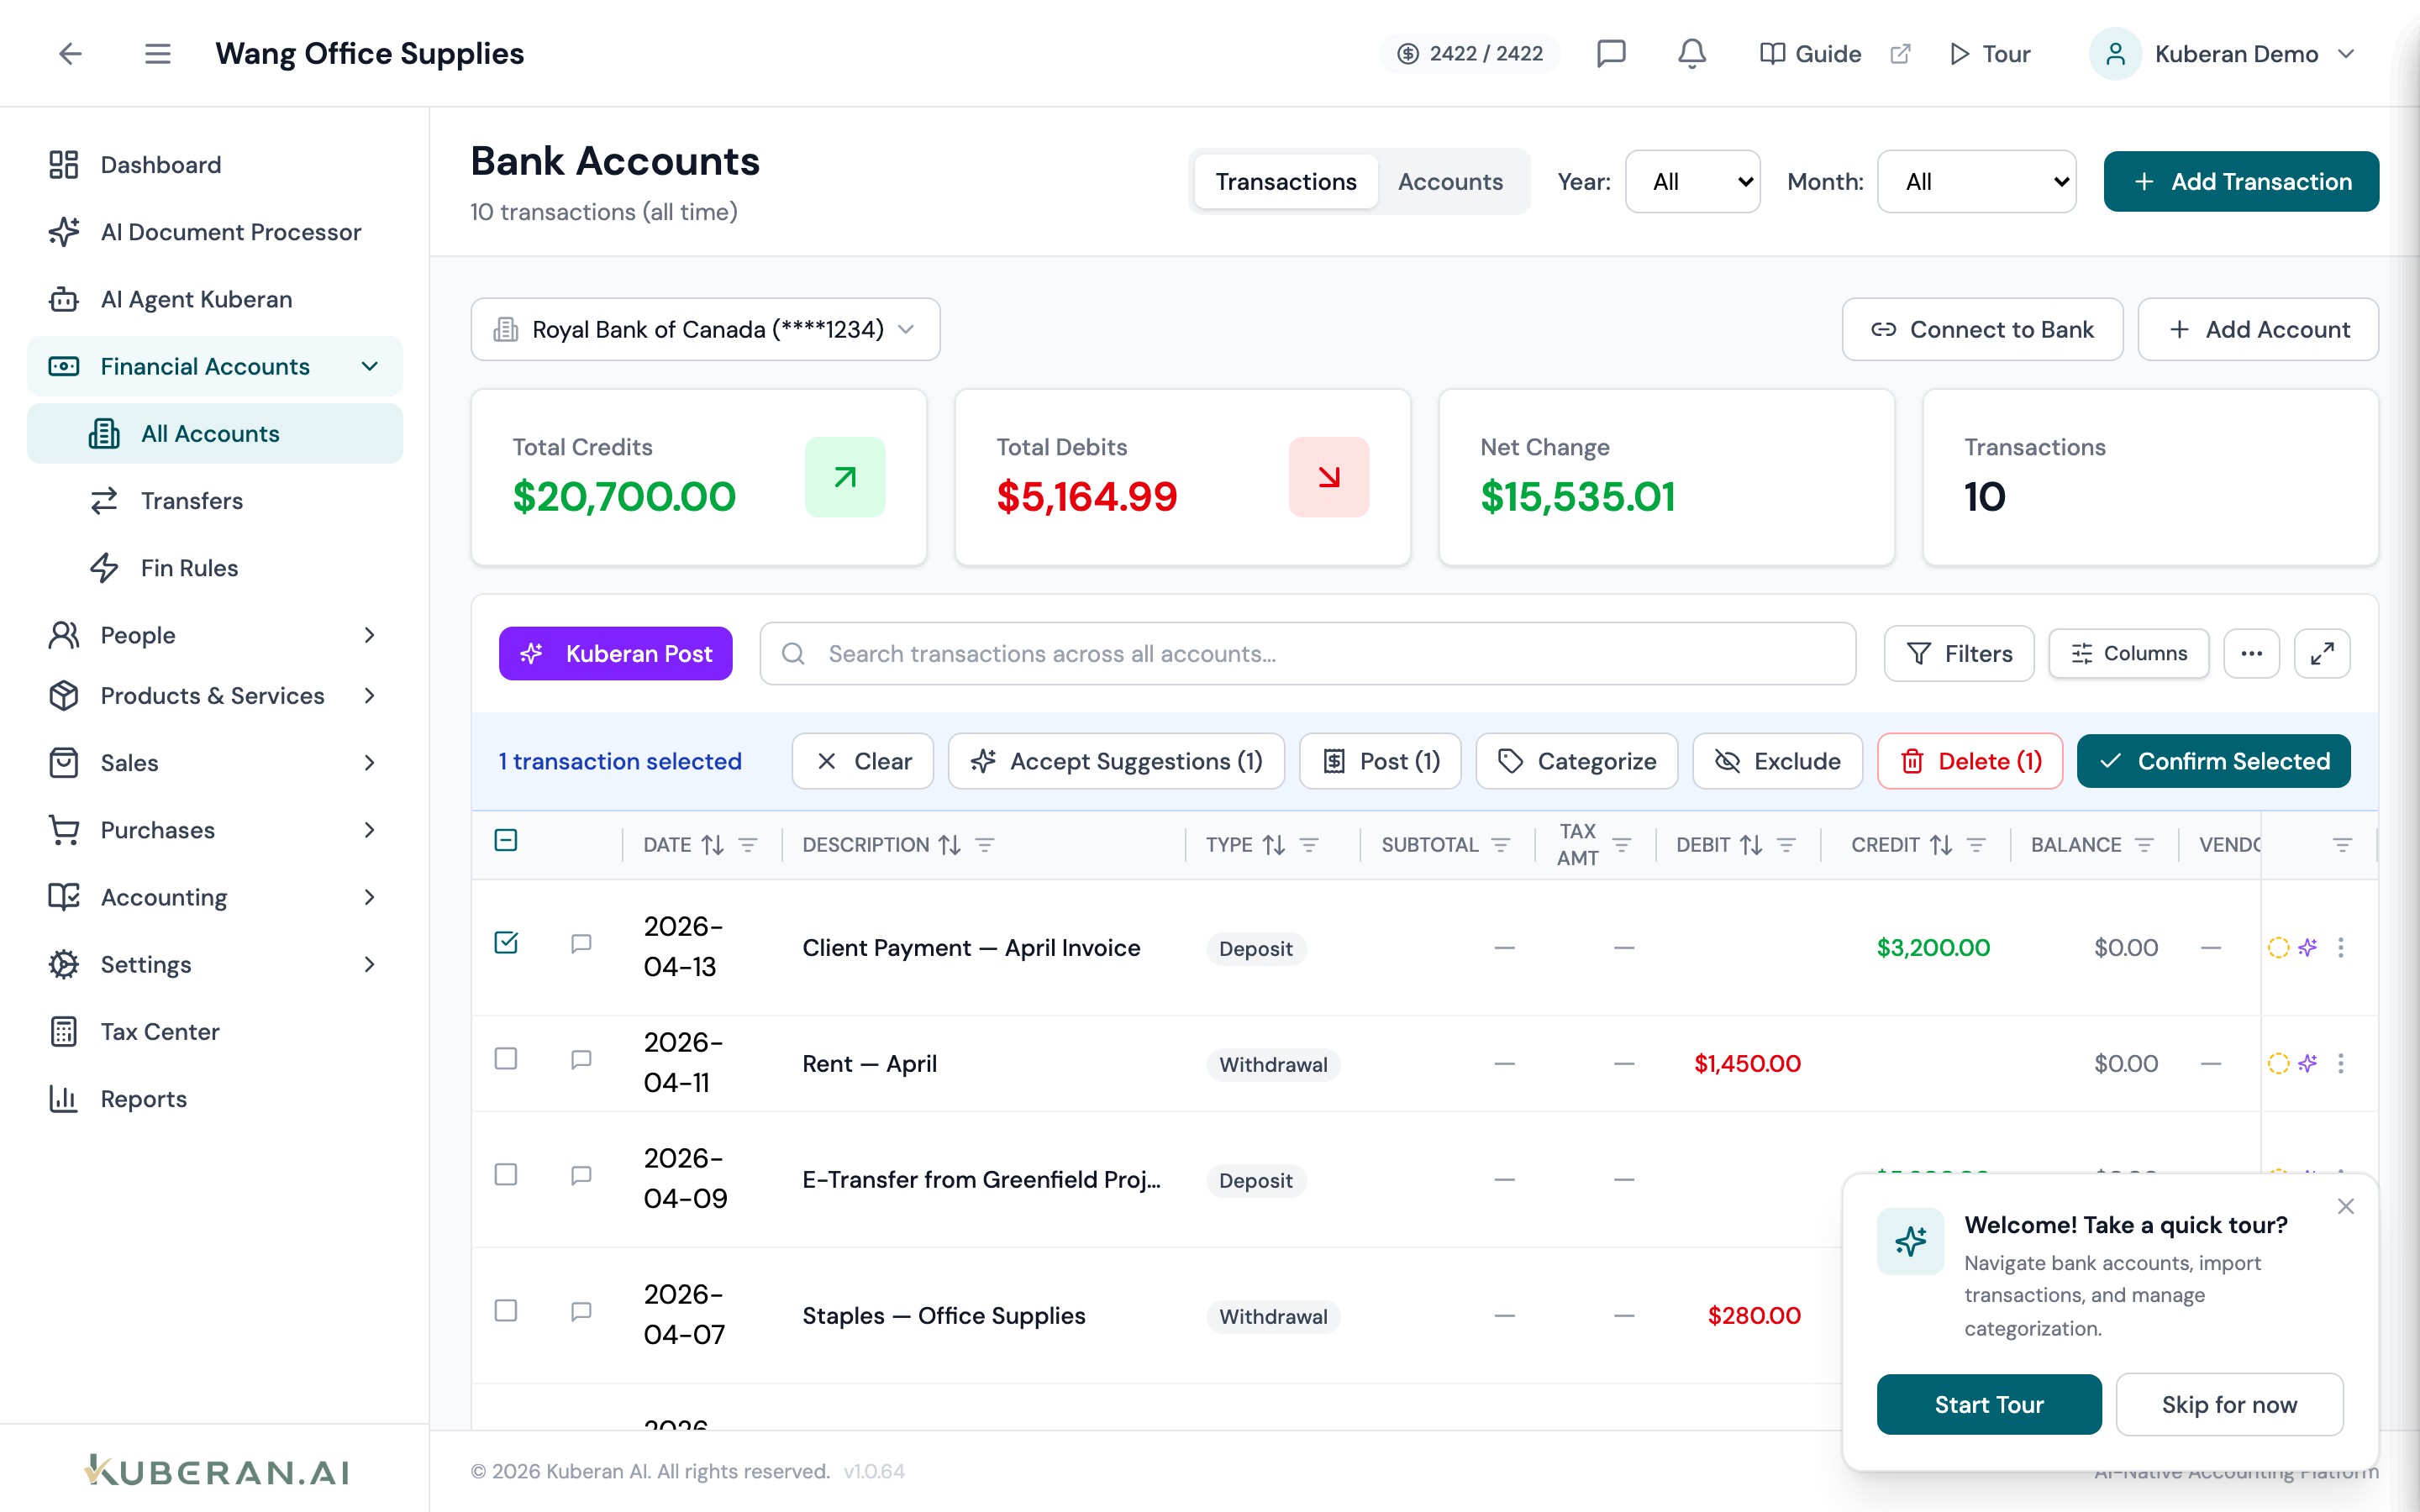
- (1) Filter bar — account, date range, and search
- (2) Column filters — per-column multi-select (status, payee, account, tax, tags) and amount/date ranges
- (3) Bank Rules indicator — lightning bolt icon on rule-matched transactions
- (4) Category column — click to assign or change the chart-of-accounts account
- (5) Bulk action toolbar — appears when one or more rows are selected
Screen Layout
Filter bar (top): Contains the Account dropdown, Date Range picker, and Search field. Most filtering is done from the column filters (see below) — each column header carries its own filter so you can narrow by status, payee, account, tax, tags, amount, or posting date independently.
Transaction table (centre): Rows are sorted by date descending by default. Rows with a pending categorisation are highlighted in amber. Click any row to expand the transaction detail panel inline.
Bulk action toolbar: Appears above the table when one or more checkboxes are selected. Shows the count of selected transactions and action buttons: Categorise, Exclude, and Create Rule.
UI Elements
Filter Bar
Multi-select dropdown listing all bank accounts connected to this client file. Select one or more accounts to narrow the list. Defaults to showing all accounts.
Start and end date pickers. Defaults to the last 30 days. Common presets available: This Month, Last Month, This Quarter, This Year, All Time.
Full-text search across payee name, description, and memo fields.
Column Filters
Each column header has its own filter. Filters are evaluated server-side and combined with AND logic — the active set is persisted in the URL and remembered between visits, so you can bookmark or share a filtered view.
Multi-select. The status of every transaction resolves to exactly one of these buckets, in priority order:
- Reconciled / Posted — cleared in a finalised reconciliation
- Confirmed — categorisation reviewed and confirmed by a user
- Matched — linked to an existing invoice, bill, payment, or transfer
- AI Applied — a category the AI applied automatically
- AI Suggestion — the AI has proposed a category awaiting acceptance
- Categorized — an account has been assigned but the transaction is not yet matched, confirmed, or reconciled
- Uncategorized — no account assigned yet
Tick any combination to show only those buckets. Ticking every option (or none) clears the status filter and shows all transactions.
Multi-select list of the payees, vendors, and customers that actually appear in the current transaction set. Vendor and Customer columns additionally offer Assigned / Not assigned and AI-suggested / Not suggested toggles so you can isolate, for example, rows the AI suggested a vendor for but no one has confirmed.
Multi-select of chart-of-accounts accounts present in the list, plus the Assigned / Not assigned and AI-suggested / Not suggested dimension toggles.
Multi-select of the tax rates applied to transactions in the list, with the same Assigned / Not-assigned toggles.
Multi-select of any tags applied to transactions.
Numeric range — set a minimum and/or maximum to find a transaction when the exact payee is unknown, or to isolate large items.
Date range filter on the column, independent of the top-of-screen Date Range picker.
Table Columns
The transaction date as reported by the financial institution. Sortable.
The payee or merchant name extracted from the bank feed. Bank rules can override this with a cleaner name. Clicking the payee name opens a filter showing all transactions from the same payee.
The transaction amount in CAD. Debits (money out) are shown in the default text colour; credits (money in) are shown in green.
The chart-of-accounts account assigned to this transaction. Displays “Uncategorized” in amber if not yet assigned. Click to open the account picker dropdown. Assigning an account moves the transaction to the Categorized status; it is fully posted to the ledger once it is matched, confirmed, or reconciled.
The badge shows the highest-priority state the transaction has reached:
- Uncategorized (amber) — no account assigned
- Categorized — an account has been assigned, but the transaction has not yet been matched, confirmed, or reconciled
- AI Suggestion — the AI has proposed a category that no one has accepted yet
- AI Applied — the AI applied a category automatically
- Matched — linked to an existing invoice, bill, payment, or transfer
- Confirmed — categorisation reviewed and confirmed by a user
- Reconciled / Posted (green) — cleared in a finalised reconciliation
Excluded transactions are a separate state — they are removed from all financial reports and hidden from the default list (surface them with the View Excluded action). See Exclude a Transaction.
A lightning bolt badge appears when a bank rule automatically applied the category. Hover over the badge to see the rule name.
Per-row actions: Categorise, Split, Exclude, Un-exclude, Create Rule, Edit Memo, View Journal Entry.
Actions
Categorise a Transaction
- Click the Category cell in the transaction row, or click the row to expand it and use the account picker in the detail panel.
- Start typing an account name to search the chart of accounts.
- Select the correct account. If the transaction includes GST/HST, select a tax-inclusive account or manually enter the tax amount in the detail panel.
- Click Save. The status changes to Categorized and the double-entry journal entry is created automatically. The transaction advances to Confirmed or Reconciled / Posted as it moves through review and reconciliation.
Split a Transaction
Use Split to allocate a single bank transaction across multiple expense or revenue accounts.
- Click ⋯ → Split on the transaction row.
- The Split panel opens showing the total transaction amount.
- Click Add Split to add lines. Assign each line an amount and a chart-of-accounts category.
- The split amounts must sum to the total transaction amount. A running remainder is shown.
- Click Save Split. The transaction is posted as a multi-line journal entry.
Exclude a Transaction
Exclude transactions that are not true business expenses — for example, a personal expense on a business account, or a bank transfer that is already recorded elsewhere.
- Click ⋯ → Exclude on the transaction row.
- Optionally enter an exclusion reason in the memo field.
- Click Exclude. The transaction status changes to Excluded and it is removed from all financial reports. The raw transaction remains visible when the Excluded filter is active.
Create a Bank Rule from a Transaction
- Click ⋯ → Create Rule on the transaction row. The rule builder pre-fills the payee name as the first condition.
- Adjust the conditions and assign the target account. See Bank Rules for full details.
- Click Save Rule. The rule applies to all future imports matching the conditions. You can optionally apply it retroactively to existing uncategorised transactions.
Import Transactions via CSV, OFX, or QBO
- Click Import in the toolbar.
- Select the target bank account from the dropdown.
- Upload the file (CSV, OFX, or QBO). For CSV files, map the columns to Date, Payee, and Amount fields using the column mapper.
- Review the import preview showing how many transactions will be added. Duplicate detection compares dates and amounts against existing records.
- Click Import Transactions. New transactions appear in the list with Uncategorised status.
Export Transactions
- Apply any filters to narrow the export to the desired date range, account, or status.
- Click Export in the toolbar.
- Select CSV or Excel. The file downloads immediately.
Related
- Bank Accounts — Connect Plaid accounts and manage manual accounts
- Bank Rules — Automate categorisation for recurring payees
- Reconciliation — Match categorised transactions to bank statements
- Chart of Accounts — Manage the account hierarchy used for categorisation