Engagements List
Overview
The Engagements list is the central hub for your practice’s client work. Every engagement — whether bookkeeping, tax return preparation, or advisory — appears here, giving you a real-time picture of workload, deadlines, and team assignments. From this screen you can create new engagements, change statuses, drill into individual engagement workspaces, and switch to the Kanban board view for a visual pipeline overview.
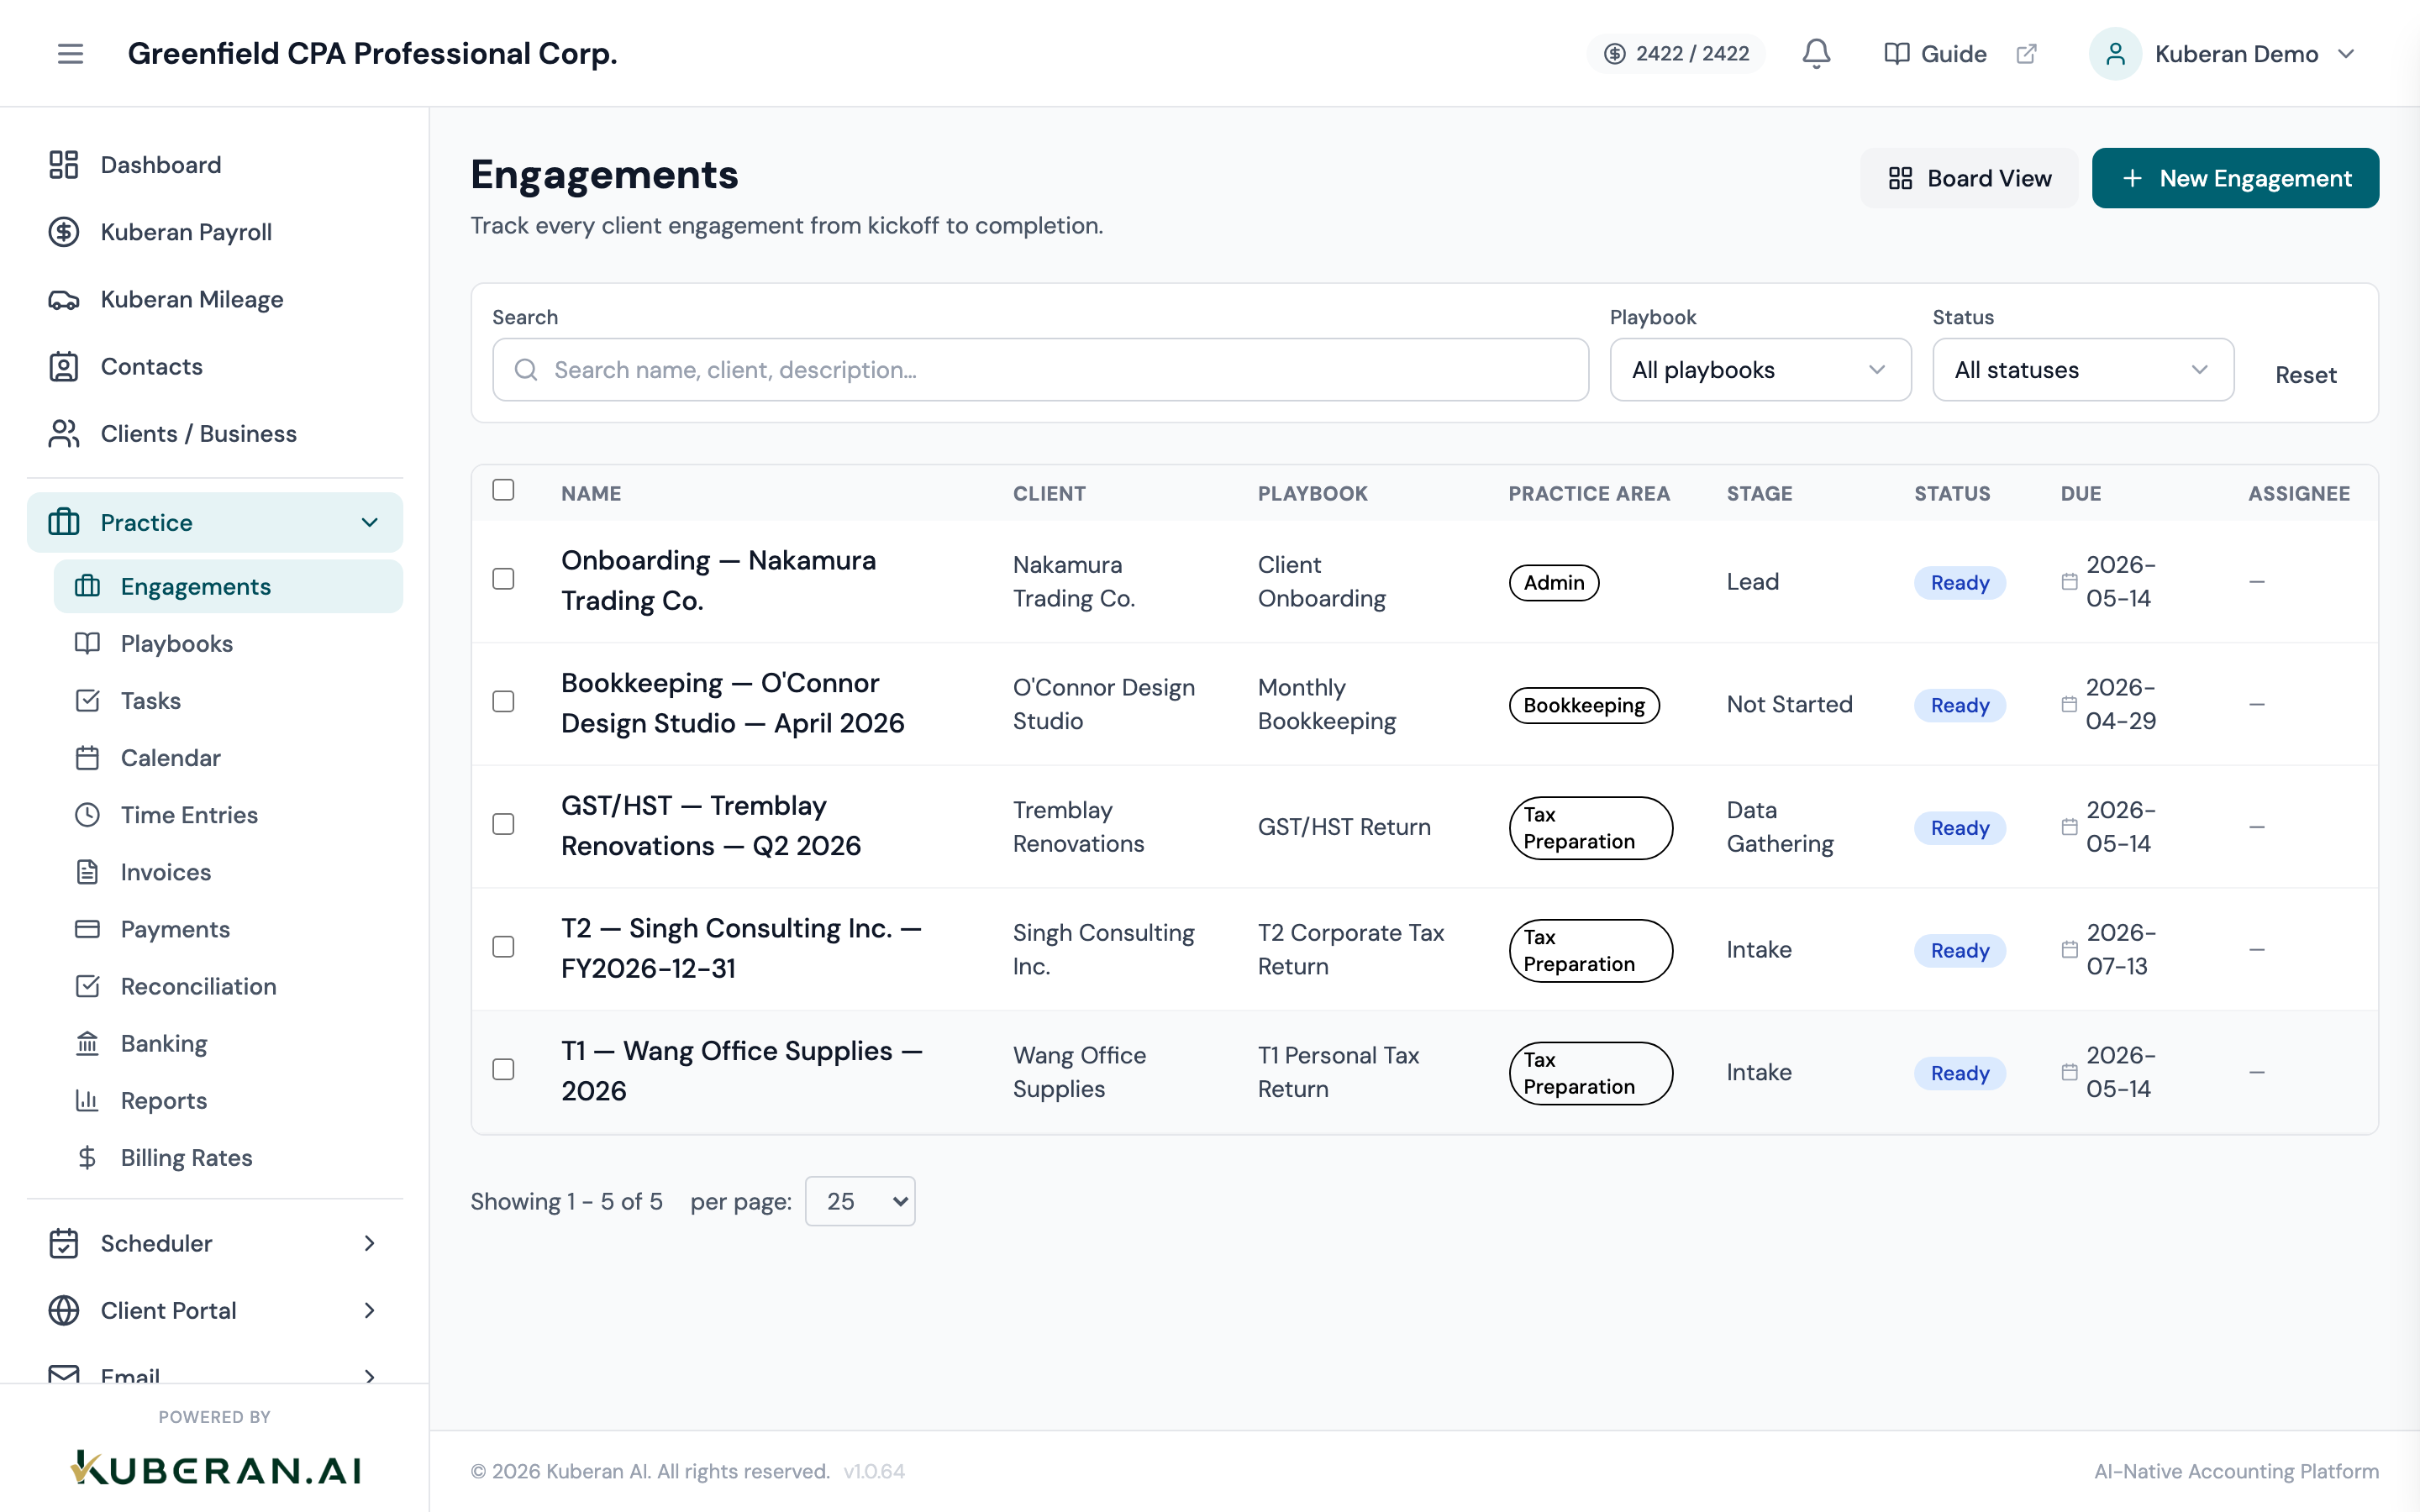
- (1) Filter bar — filter by status, type, assignee, and due date range
- (2) Add Engagement button — opens the New Engagement drawer
- (3) Board View toggle — switches to the Kanban pipeline view
- (4) Engagement table — sortable columns with inline status badges
- (5) Row actions menu — per-row quick actions (Edit, Archive, Delete)
Screen Layout
The screen is divided into three zones:
Toolbar (top): Contains the search field, filter chips for Status and Type, the date range picker for Due Date, the assignee filter dropdown, the Board View toggle button, and the Add Engagement button.
Engagement Table (centre): The primary data grid. Rows are sorted by Due Date (ascending) by default. Clicking any row opens the Engagement detail workspace in a right-side panel.
Pagination footer (bottom): Displays the total engagement count and page controls. The default page size is 25 rows.
UI Elements
Toolbar
Full-text search across client name, engagement title, and assignee. Results update as you type with a 300 ms debounce.
Multi-select dropdown. Options: All, Draft, Active, In Review, Awaiting Info, Completed, Archived. Selected statuses appear as dismissible chips.
Multi-select dropdown. Options: All, Bookkeeping, Tax, Advisory, Other. Combined with the Status filter using AND logic.
Date range picker. Shows engagements whose due date falls within the selected range. Leave blank to show all dates.
Filters by the team member assigned to the engagement. Lists all active workspace members plus an “Unassigned” option.
Switches the display to the Kanban board view. The current filter state is preserved when toggling between views.
Opens the New Engagement side drawer. Teal accent, positioned at the top right of the toolbar.
Table Columns
The client this engagement belongs to. Rendered as a link; clicking opens the client profile. Sortable.
Free-text title given to the engagement (e.g., “2024 T2 Corporate Return”). Clicking opens the engagement workspace. Sortable.
Engagement type badge: Bookkeeping (blue), Tax (indigo), Advisory (amber), Other (grey).
Colour-coded status pill. Draft (grey) · Active (teal) · In Review (blue) · Awaiting Info (amber) · Completed (green) · Archived (slate). Clicking the badge opens an inline status-change popover.
The engagement deadline. Dates within 7 days show in amber; overdue dates show in red. Sortable.
Avatar and name of the assigned team member. Click to reassign inline.
Compact progress indicator showing completed/total tasks (e.g., “3 / 7”). A circular progress ring fills in teal.
Per-row overflow menu with options: Edit, Duplicate, Archive, Delete. Edit opens the engagement detail drawer; Archive moves the engagement to Archived status without deleting it.
Status Badges
| Badge | Colour | Meaning |
|---|---|---|
| Draft | Grey | Created but work has not started |
| Active | Teal | Work is currently in progress |
| In Review | Blue | Work complete; awaiting internal or client review |
| Awaiting Info | Amber | Blocked pending information from the client |
| Completed | Green | All tasks done; engagement closed |
| Archived | Slate | Removed from active pipeline; read-only |
Actions
Create an Engagement
- Click Add Engagement in the top-right toolbar. The New Engagement drawer slides in from the right.
- Select a Client from the dropdown. Start typing to search by client name.
- Enter an Engagement Title that describes the work (e.g., “Q3 2024 Bookkeeping”).
- Choose an Engagement Type: Bookkeeping, Tax, Advisory, or Other.
- Optionally select a Playbook to pre-populate the task list from a template.
- Set the Due Date using the date picker.
- Select an Assignee from your team member list.
- Leave Status as Draft or change to Active if work is beginning immediately.
- Click Create Engagement. The engagement appears in the table and, if a playbook was chosen, its tasks are automatically created.
Change Engagement Status
- Locate the engagement in the table. Click the coloured Status badge in the Status column.
- A popover displays all available status transitions for the current state.
- Click the target status. The badge updates immediately and a timestamped status-change event is recorded in the engagement activity log.
Filter the Engagement List
- Click the Status Filter dropdown and select one or more statuses to include.
- Click Type and select one or more engagement types.
- Use the Due Date Range picker to narrow by deadline window.
- Select an Assignee to see only that team member’s engagements.
- All active filters appear as chips below the toolbar. Click the × on any chip to remove it, or click Clear all to reset.
Archive an Engagement
- Click the ⋯ row actions menu on the engagement you wish to archive.
- Select Archive.
- Confirm the action in the dialogue. The engagement moves to Archived status and is hidden from the default list view.
- To view archived engagements, add “Archived” to the Status filter.
Delete an Engagement
Deletion is permanent and removes all associated tasks, time entries, and notes. Archiving is recommended instead for completed work.
- Click the ⋯ row actions menu.
- Select Delete.
- Type the engagement title in the confirmation dialogue to confirm.
- Click Delete permanently.
Related
- Engagement Board View — Kanban pipeline showing engagements by status column
- Playbooks — Create reusable task templates to attach when creating engagements
- Tasks — View all tasks across every engagement in one list
- Time Entries — Log and approve billable hours tied to engagements